(925) 522-1780
Bay Area, CA
Mon-Sat 6a - 6p
Diesel engines provide an incredible blend of reliability and efficiency, especially for heavy equipment like trucks and trailers. However, they can malfunction sometimes. Glow plug problems are a common issue that vehicle owners experience, so it's worth understanding how to test glow plugs.
All Bay Diesel, the best choice for mobile diesel repair service in the Bay Area, is here to explain how to test glow plugs in seven easy steps.
Before learning how to test glow plugs, you should understand how they work. Glow plugs are an integral part of any diesel engine's combustion process. Traditional spark plugs found in gas vehicles don't work well in diesel engines, as diesel fuels rely on warm air to ignite.
Without glow plugs, diesel engines wouldn't be able to start reliably in cold weather conditions. Glow plugs bypass temperature problems by heating air inside the engine's combustion chambers, igniting the air-fuel mixture, and getting your engine running. Most diesel engines have a one-to-one glow plug-to-cylinder ratio.
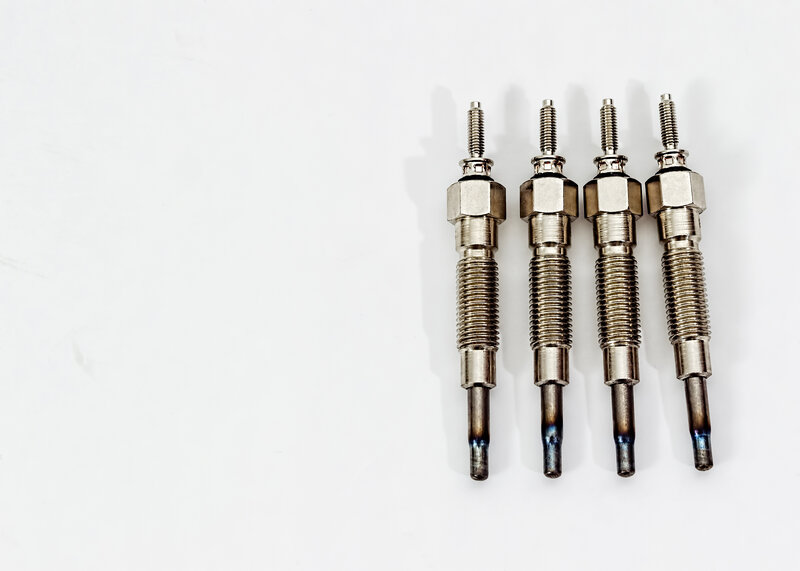
Glow plugs have three main parts: a tip, a body, and a terminal end. The terminal end connects to electrical wiring, jumpstarting the combustion process, while the body passes through the cylinder head to ground this current. As neat as these plugs can be, they're unfortunately prone to wear and tear, just like regular spark plugs.
If you're wondering how to test glow plugs to guarantee that your vehicle runs safely and smoothly, rest easy; it's not that hard. Here is a seven-step plan you can follow.
Any proper engine inspection must start with a thorough check-up. If your vehicle's check engine light is on, refer to your owner's manual to see if there is a corresponding diagnostic trouble code. Sometimes, you can tell ahead of time whether or not your glow plugs are causing you grief by reading these codes.
After that, you're going to want to take a look at your plugs. Do you see any visible signs of damage? Are they dirty, or is there bad electrical wiring?
Once you've taken a good look at your glow plugs, try using an infrared thermometer. Start by revving your engine up a few times to heat your glow plugs, then scan each plug with the thermometer. If there are one or two plugs that have a strangely low-temperature reading, chances are they're not working right.
However, there's potential for false positives with this test, so you ought to use a multimeter for your main testing.
If you want to know how to test glow plugs, the best possible way is to use a multimeter. Multimeters use positive and negative leads to test electrical current levels. Once you've acquired a digital multimeter, set it to read ohms and then cross the two leads.
Crossing the leads and making a note of the reading will tell you your unit's resistance value. Any future readings you make of your glow plugs should subtract the resistance value to guarantee the most accurate result.
Now that you've prepared your multimeter, you can start by testing that handy car battery of yours. Unlike before, you'll want to set your multimeter to read volts. Once you're ready to go, match your unit's positive lead with the positive terminal on your battery, and do the same with your negative lead and negative terminal.
It's not too hard, but this process will tell you just how many volts are running through your glow plugs when you drive your vehicle. Your battery should read about 13 volts when your truck is operational and around 12.5 when it's not.
Now, you can finally test those glow plugs. Use your vehicle's manual to locate where exactly each plug is on your engine, and then remove their connector pieces. These caps sometimes accumulate dirt or rust; cleaning them is a smart idea.
If you're only testing one glow plug, you won't need to remove the caps on each and every one. However, it's never a bad idea to test all of your glow plugs at the same time, so you may want to go ahead and remove all of them, anyway.
It's time to set your multimeter back to ohms. Then, place the red positive lead onto your plug, followed by attaching the black negative lead to a grounding source.
Finding a grounding point isn't too difficult. All you need to do is consult your owner's manual or find a bolt where the wire connects your battery's negative terminal to your engine wall. You can also try using the engine block.
Different vehicles, depending on their size, model, and type, have different ideal glow plug ratings. When in doubt, take a look at that trustworthy manual of yours to find out what your reading should be. Also: don't forget to subtract your resistance value from each reading!
So, for instance, if you have a reading that measures .7 ohms, and a resistance value of .3 ohms, your true reading will be .4 ohms. However, test each and every glow plug to make sure that they're all reading the same amount.
Even one bad glow plug can ruin it for the rest of them. So, if you have one plug with a bad reading or another that reads okay but looks nasty, go ahead and replace all of them.
Now that you know all about testing glow plugs, you should consider working with professionals to replace your vehicle's glow plugs. Here at All Bay Diesel, we have years of experience helping heavy equipment owners fix their tractors, trucks, and forklifts' glow plugs. You can count on us for the absolute best possible service in the Bay Area.
So, if you have any questions like "Do diesel engines have spark plugs?" or if you want to schedule service, call us at (925) 522-1780 today!